

Linux is — usually — designed to be flexible. Have you ever wondered how programs that need your password work? Obviously, they can’t all check your password. Besides, what about things like fingerprint readers or hardware keys? It is analogous to the situation with printers. It would seriously suck if every program had to know about every brand and model of printer.
In the case of printers, the operating system abstracts the printer so programs just print in a generic kind of way and the system takes care of the rest. Authentication is the same way. A system known as PAM takes care of the details.
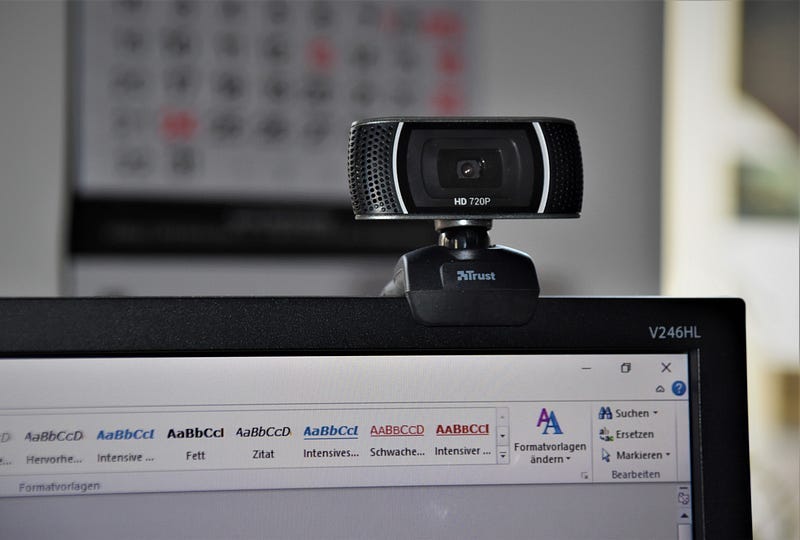
Inside /etc/pam.d (and /etc/pam.conf), you can configure different authentication strategies for different pieces of software. I’m not going to get into the details (there are plenty of places to read about the gory insides). What I will do, is show you how I got facial recognition running on my KDE Neon (a Ubuntu-derived distro) using a simple webcam and some open source software.
Bonus Tip
It is a little dangerous poking around inside PAM. The reason? If you screw up badly enough, you might not be able to log into your machine. Ever. Well, maybe not ever, but you’d need to boot off a live image, mount your hard drive, and fix the problem.
However, I wasn’t worried about that because of my setup. My computer is mine and it is in my office which is reasonably secure. So I never log into it. Instead, I have SDDM set to log in automatically. Horrors! How insecure! You are right, however, there’s a twist.
I also have a simple shell script that runs on each login. Just two lines:
#!/bin/sh
loginctl lock-session
That’s it. So you might have a few milliseconds when the computer turns on to try to stop that script from running. Otherwise, you need the password to unlock. You might wonder why that’s an advantage. When the computer restarts, it will start loading my browser and anything else in the session before I even log in. By the time I do log in, things are ready to go. As a side benefit, your wireless network will start, too, even if you don’t have it set as a system-wide connection.
OK, so be careful if you mess with your login PAM configuration or do like I do and don’t do it! If you want to mimic my setup for login, head over to System Settings and check out the Startup and Shutdown category. The Autostart tab lets you launch the script and under “Login Screen (SDDM)” you’ll be able to click Behavior to set up an automatic login.
Back to Facial Recognition
Head over to GitHub and follow the instructions to set up the software. Since Neon is derived from Ubuntu, I used the Ubuntu 18.10+ instructions. Basically, you run apt-get, edit one file, and then run the software from the repository. You’ll want your camera hooked up and good lighting because the installer will take your picture!
The install places some files in /lib/security/go-face-unlock and also patches two files in /etc/pam.d. These files let you use sudo and su with your face. If it can’t find your face, you’ll still get a password prompt.
Testing it Out
Here’s an easy way to see if it is working (you don’t need to type the # marks or anything after them on a line). Your browser may wrap the lines, but there are two lines, each starting with sudo:
sudo -k # forget if we've already logged in with sudo recentlysudo ls # Silly, but stillTry this with your face pointing at the camera. It should work without a password. Then put your hand over your face or cover your face with something. Try again. You should get a password prompt.
If things aren’t working, you might want to look in /var/log/auth.log to see what’s going on.
More Features
I wanted to use my face for more than just sudo. This required just a little more work. The systemd commands use a common framework called polkit to authenticate, so I wanted to modify /etc/pam.d/polkit-1. The KDE screensaver, despite documentation to the contrary, uses /etc/pam.d/common-auth.
My first step was to add this line to the start of each of those files:
auth sufficient pam_exec.so quiet stdout /lib/security/go-face-unlock/mainNote that this is all one line despite what your browser might be showing you.
For systemd, this is sufficient. You can use the systemctl command without sudo and it will accept your face as permission to do its job.
The KDE screensaver, however, isn’t that easy. The problem is that it runs the unlocker as a non-root user and this causes problems. The solution is to run this command once:
sudo chmod o+x /lib/security/go-face-unlock/mainNow to unlock the KDE screen lock, press a key and when it prompts you for a password, just hit Enter or click the continue button. If it knows your face, you are in. Again, if not, you’ll need to enter a password as usual.
Is it Secure?
How secure is this? Probably not very. I haven’t tried it, but I suspect a good picture of my face would unlock my computer. But it does work pretty well and if you aren’t using your computer for National Security purposes, you should be OK.
You can experiment with other PAM files to allow other software to unlock with your face. Again, looking at /var/auth.log is your friend when you are trying to figure out what is asking for a password. Try:
tail -f /var/log/auth.logSo have fun, be careful and remember… Smile!
Update
Recent versions of SDDM show you an unlock button when you unlock with your face which is annoying. Here’s the solution. Edit /etc/pam.d/common-auth. You will find a line that starts:
auth [success=1 default=ignore]....You need to change this line and add one after it. If you’ve already installed face unlock here, you may have to remove the first line in the file which should look like the line I’m telling you to add. Here’s the section that changes:
# here are the per-package modules (the "Primary" block)
auth sufficient pam_unix.so try_first_pass likeauth nullok
auth sufficient pam_exec.so quiet stdout /lib/security/go-face-unlock/main
# here's the fallback if no module succeeds
The comment (#) lines should already be there as well as most of the first line. Note that despite how your browser might be wrapping the code, there are 4 lines here. The first and last start with #. The other two lines start with the token “auth” so be sure to get the entire line even if it wraps in your browser.